
As a rite of passage or a sign of growing up, learning how to drive is essential. It can be both thrilling and dangerous. You can take yourself from point A to point B, but if you’re not careful, accidents can happen. To lessen the odds of potential accidents, you need to implement the correct driving posture.
As you read on, you’ll learn how to position yourself behind the wheel properly. When in the right position, you’ll do more than avoid accidents on the road.
Why Do You Need to Sit in the Correct Driving Posture?

When you’re in the right position, even while driving, you’ll ultimately prevent future injury and serious accidents on the road. Being in the correct driving posture will help you avoid bodily issues in the long run like neck/back pain.
To achieve the correct driving posture, you need to make a few adjustments. In particular, you need to adjust a couple of things with your body and your car.
What Do You Need to Adjust With Your Body and Your Car?
There are so many factors that contribute to the proper driving position. Some of these include the height of the car seat to mirror adjustments. Most important, and even the most overlooked, is how long your drive should be.
Clocking Your Drive Time

If you work in an office, this might sound familiar. Like any regular office job, you shouldn’t sit behind a desk too long. Sitting in the same position for too long is detrimental to your neck and back, especially for people suffering from musculoskeletal disorders (MSDs). They have a harder time for shorter periods.
It’s best to have regular breaks, in any way you can. It still depends on the person and their availability. Take a break every twenty (20) minutes or two (2) hours for five to twenty (5-20) minutes at a time.
Looking over the Car Build

The car or vehicle should suit you, not the other way around. Find a car that best suits your height. Don’t get a supermini if you’re over six (6) feet tall. Find vehicles that provide various adaptable options for the steering wheel and the seats.
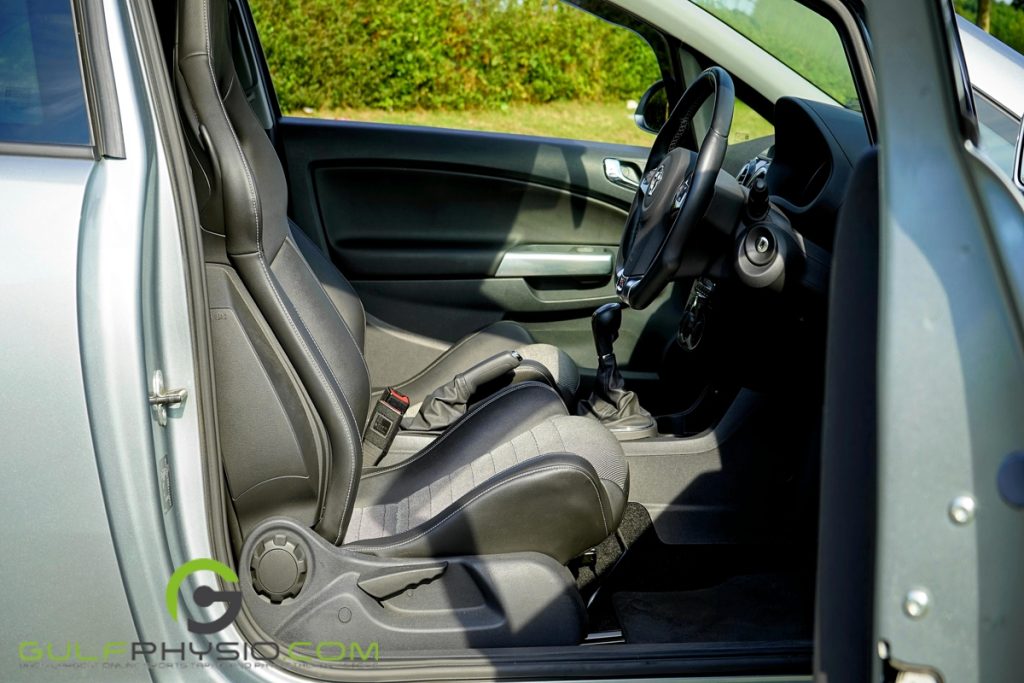
Checking Your Ideal Position

The driver’s car seat should start in the wrong position. It might sound counterintuitive, but you’ll put it in the right position from there. The seat should be moved back. Lower it as far as it can. Let the back of the sear lean back to around thirty to forty (30-40) degrees. As for the steering wheel, manoeuvre it as close to the dashboard as possible if it’s permissible.
Balancing the Seat Height

Let’s start from the ground up. While sitting, move the seat up to the height of your hips or your knees. You should be able to see the roads as well as the steering wheel, dashboard, and the like. The path in front of you should be at eye level and straight.
The seat height could still be too low. Get a cushion or wedge for the seat. Cushions are also fantastic for lessening vibrations on the road, lowering injury risks.
For the seat itself, make room for the back of your knees to promote proper blood circulation. As a rule, there should be a two (2) finger gap between the car seat and your knees.
Positioning the Seat

Now we’re back to the front of things. Readjust the seat going forward. You should be able to lay your feet flat on the pedals without moving your back. Mind your knees since having them too bent or straight can cause long-term pain. The small bend in your knees should be around 20-30 degrees.
As for your feet, your heels should be at rest with the balls of your feet reaching the pedals. With your right heel in between the brake pedal and the accelerator, you should easily press both.
When the clutch is not in use, it’s best to have your left foot on the footrest. This way, you’ll have more support for your back and pelvis. Since some automatic cars rely on a gear shifter instead of a clutch pedal, they’re better for your body overall.
Tilting the Seat Back

A car seat is typically set with its bottom down and the front elevated. This is to avoid submarining. It’s when you’re abruptly thrust forward from your seat. Submarining happens when you suddenly need to hit the brakes in an accident.
The good news is that modern vehicles have overcome this problem by adding seat belt pretensioners. They put a stop to you slipping under the seat belts. These additions are even shown to add pressure to the lower back/spine while lessening the hip angle. To maximise the benefits, the seat bottom should always be horizontal.
Inclining the Seat

The inclination of the seat back should be at an angle as well. The angle should range from 100 to 110 degrees. Keep this range constant to decrease the pressure you put on the discs in your lower back.
Supporting the Lumbar
A lot of cars already have lumbar support attached to their car seats. Most of the time, these lumbar supports are adjustable by depth and height. A good lumbar support should settle in nicely at the curve of your lower back. The base of the support should be at the top of the pelvis or around the beltline. The lumbar support should comfortably fill the curve of your back.
You can rearrange the lumbar support by sliding it down to the right position. To determine the amount of curve you need, push your hand behind your back while having it flat on the seatback. The size is relative to how much you can snugly fit your hand there.
One of the simplest and cheapest ways to add your lumbar support is with a rolled-up towel. However, it’s not a long-term solution like a detachable foam roll or backrest. It can come in all sizes, from a “D” shaped foam support to a flatter lumbar cushion. There are even ventilated and firm ones. Trial and error is still imperative to find the right fit.
Aiding the Rib Cage or the Thoracic Spine

Your shoulders are the basis for the back of your car seat. The seat and headrest should be relatively the same height as your shoulders. Luckily, a majority of vehicles have headrests that can accommodate any size. Align the height of the headrest so it sits right in the middle ground of your head.
Now, it’s time to work with the front-to-back position. Keep your head in a neutral position by sitting in an upright position. Then, line your earlobes by the middle of the neck muscles and collarbone. It’s like holding a ball in between your chin.
At this point, you can move the headrest forward. It should meet the back of your head. Another person can check your alignment for better accuracy.
Adjusting the Car Mirrors

Next, you can adjust the mirrors once you’re in the correct sitting position. The mirrors are there so that the driver has optimal rear visibility. They are critical for your correct driving posture as well as your performance on the road.
The optimal rear view is achievable when your car mirrors are angled correctly. Changing your posture might make your view unclear or distorted. Realign your position by sitting up straight and trying again.
Using the Seatbelts

Nowadays, vehicles have either adjustable seat belts or three-point seat belts. The three-point kind reduces injury during accidents.
Fasten your seat belt with the hand opposite the side of the belt itself. If you use the arm on the seat belt side, it can put your arm in a “closed pack position”. The band around your waist should cover your pelvis instead of your abdomen. The seat belt holds onto the pelvic bones instead of vital organs during an impact in this way.
The diagonal section of the seat belt should catch the sternum and clavicle. It should never pass over the underarms, neck, or shoulder. A seat belt should get hold of the prominent bones in your upper body rather than the soft tissues. In this way, you can avert twisting in emergencies.
Positioning the Arms on the Steering Wheel

Airbags are revolutionary for vehicle safety overall. They effectively decrease the risk of head or upper-body collisions in accidents. For the airbag in your steering wheel to be fully functional, they should be at a certain distance. A good minimal distance is twenty-five to thirty centimetres (25-30 cm) or ten to twelve inches (10-12 in).
It’s easier to have the correct arm/shoulder position when your steering wheel has height and rake adjustment capabilities. With these features, you don’t need to shift the seat back and forth to put it in the correct position.
While sitting still with straight arms, your shoulder blades should touch the seatback flat. Your wrists should also reach over the edge of the steering wheel with little to no effort. Your arms should bend around 120 degrees while driving.
Fixing the Steering Wheel Height

The driver should have a clear view of the steering wheel and dashboard. The palms should only be a little lower than your shoulders. As you adjust the height of your steering wheel, you should also consider your favoured position. Typically speaking, it’s compared to a clock face.
Individuals with shoulder and neck problems usually prefer the “seven and four” (7 & 4) position. Even when you use your neck and shoulder muscles more, the “nine and three” (9 & 3) position gives better leverage. Grip the wheel with your fingers as lightly as possible to avoid getting tired easily.
Lastly, use both hands while steering and never steer with one hand on the top of the wheel. Overusing just one hand might twist your spine.
Additional Factors That Can Correct Driving Posture

Some overlooked sections of the car that can affect correct driving posture are the gear shift and handbrake.
In an automatic or manual car, changing gears might worsen current neck and shoulder conditions. Adjust your seat position when your neck or shoulder problem is on the same side as the gear shift. It will also affect your driving posture. Adapting a neutral arm position (not straight nor reaching a 90-degree bend) while driving should be your goal.
The presence of parking or handbrakes could also still hinder people with shoulder and neck problems. If that’s the case, vehicles with electronic or foot-operated parking or hand brakes should be your best bet.